Get ready to embark on a culinary journey that will transform your kitchen into a Korean street food paradise! These irresistible kimchi pork steamed buns are not just a recipe – they're a flavor explosion waiting to happen. Imagine soft, pillowy steamed dough embracing a spicy, savory filling that will make your taste buds dance with joy. Whether you're a Korean cuisine enthusiast or a curious foodie looking to expand your cooking repertoire, these steamed buns are about to become your new obsession.
Prep Time: 45 mins
Cook Time: 15 mins
Total Time: 1 hrs
Cuisine: Korean
Serves: 10 buns
Ingredients
- 2 cups all-purpose flour
- 1/2 cup warm water
- 1/4 cup sugar
- 1 packet active dry yeast
- 1/2 lb ground pork
- 1 cup kimchi, chopped
- 1 tbsp gochujang
- 1 tbsp sesame oil
Instructions
- In a large mixing bowl, combine 2 cups of all-purpose flour, 1/4 cup of sugar, and 1 packet of active dry yeast. Mix well to ensure the yeast is evenly distributed.
- Gradually add 1/2 cup of warm water to the dry ingredients. Stir with a wooden spoon or spatula until a rough dough forms.
- Transfer the dough onto a lightly floured surface and knead for about 10 minutes until the dough is smooth and elastic.
- Place the kneaded dough in a lightly greased bowl, cover it with a damp cloth or plastic wrap, and let it rise in a warm place for about 30 minutes or until it doubles in size.
- While the dough is rising, prepare the filling. In a medium bowl, combine 1/2 lb of ground pork, 1 cup of chopped kimchi, 1 tablespoon of gochujang, and 1 tablespoon of sesame oil. Mix well until all ingredients are fully incorporated.
- Once the dough has risen, punch it down to release the air. Divide the dough into 10 equal pieces and shape each piece into a ball.
- Flatten each dough ball into a circle about 3-4 inches in diameter, ensuring the edges are slightly thinner than the center.
- Place a generous tablespoon of the kimchi pork filling in the center of each dough circle.
- Carefully fold the edges of the dough over the filling, pinching them together to seal the bun tightly. Make sure there are no gaps for the filling to escape.
- Line a steamer basket with parchment paper or cabbage leaves to prevent sticking. Place the buns in the steamer, leaving space between each to allow for expansion.
- Bring water to a boil in a pot and then reduce to a simmer. Place the steamer basket over the pot and cover it with a lid.
- Steam the buns for about 15 minutes, or until they are fluffy and cooked through.
- Once cooked, carefully remove the buns from the steamer and let them cool slightly before serving.
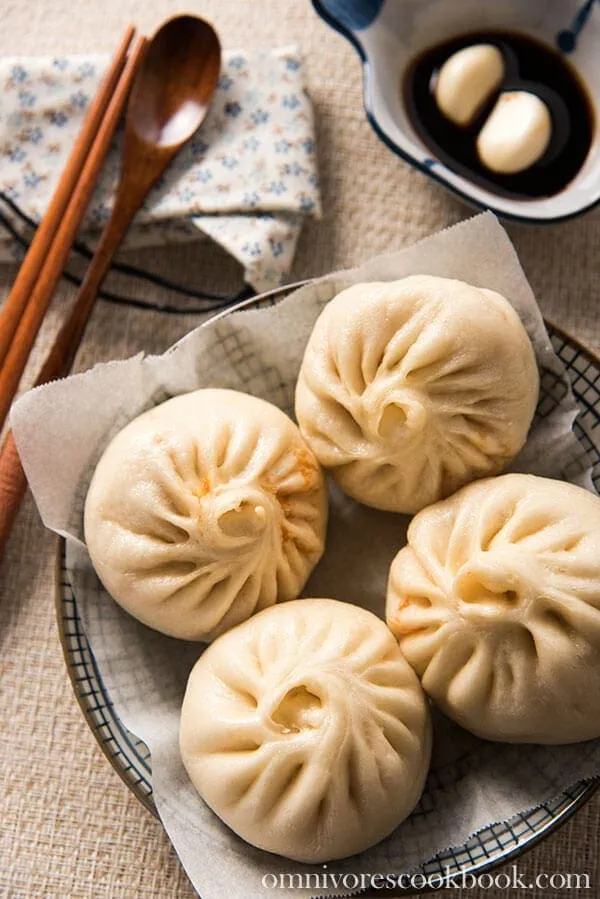
- Enjoy your addictive kimchi pork steamed buns warm, either on their own or with a dipping sauce of your choice!
Tips
- Yeast Activation: Ensure your warm water is not too hot, which can kill the yeast. Aim for a temperature around 110°F (43°C) for perfect dough rising.
- Kneading Technique: When kneading the dough, use the heel of your hand to push and fold, creating a smooth and elastic texture that will result in fluffy buns.
- Filling Preparation: Chop the kimchi finely to ensure even distribution of flavor and to prevent large chunks from tearing the dough.
- Sealing Buns: Take extra care when sealing the buns to prevent them from opening during steaming. Pinch the edges firmly and twist slightly to create a secure closure.
- Steaming Hack: Don't overcrowd the steamer. Leave enough space between buns for them to expand and cook evenly.
- Serving Suggestion: These buns are best served immediately after steaming. If you have leftovers, you can reheat them in a steamer or microwave with a damp paper towel.
- Customization: Feel free to adjust the spice level by increasing or decreasing the amount of gochujang to suit your taste preferences.
Nutrition Facts
Calories: 180kcal
Carbohydrates: 22g
Protein: 8g
Fat: 7g
Saturated Fat: 2g
Cholesterol: 25mg