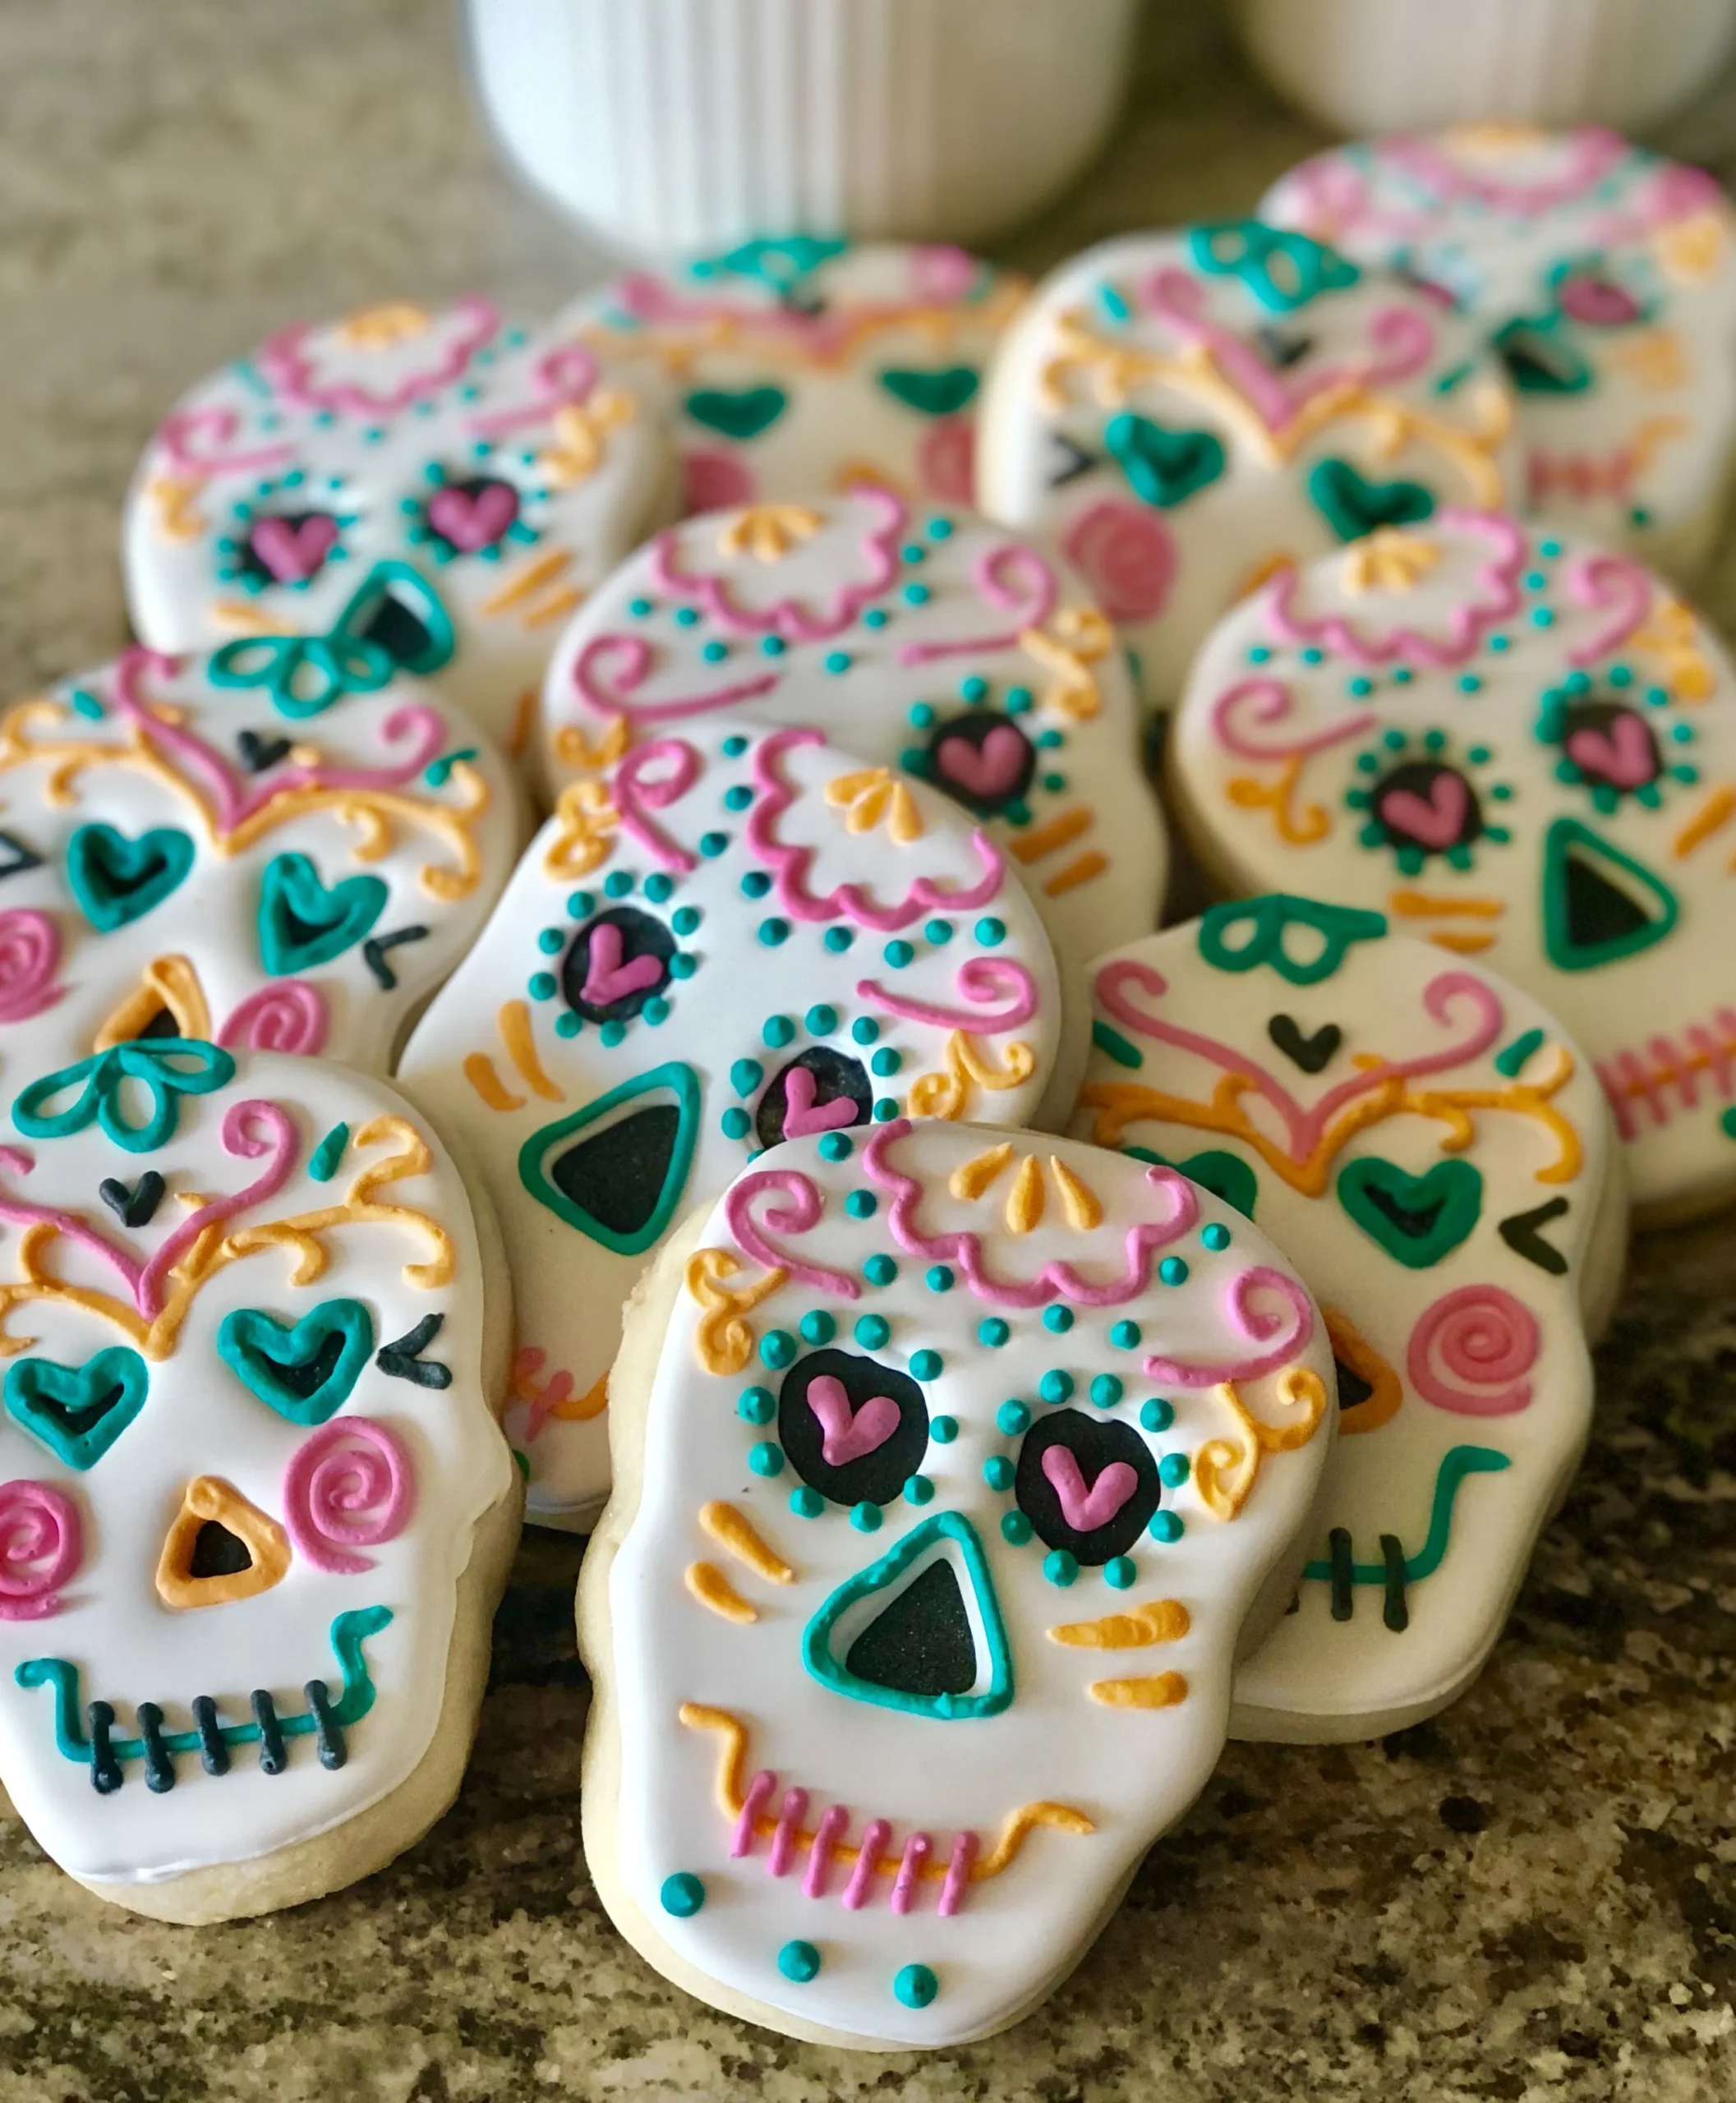
Get ready to transform your kitchen into a deliciously macabre bakery with these show-stopping Halloween Sugar Cookie Skulls! These aren't just ordinary cookies - they're edible works of art that blend sweet tradition with spine-chilling creativity. Perfect for Day of the Dead celebrations or your Halloween party, these intricately decorated skull cookies will be the talk of the event, impressing both kids and adults with their stunning design and mouthwatering flavor.
Prep Time: 20 mins
Cook Time: 10 mins
Total Time: 30 mins
Cuisine: American
Serves: 24 cookies
Ingredients
- 2 3/4 cups all-purpose flour
- 1 teaspoon baking soda
- 1/2 teaspoon baking powder
- 1 cup unsalted butter, softened
- 1 1/2 cups white sugar
- 1 egg
- 1 teaspoon vanilla extract
- 1/2 teaspoon almond extract
- 1/4 teaspoon salt
- Royal icing for decoration
Instructions
- Preheat the oven to 375°F (190°C) and line two baking sheets with parchment paper or silicone baking mats.
- In a medium bowl, whisk together the all-purpose flour, baking soda, baking powder, and salt. Set aside.
- In a large mixing bowl, cream the softened butter and white sugar together using an electric mixer until light and fluffy, about 3-4 minutes.
- Add the egg, vanilla extract, and almond extract to the butter mixture. Beat until well combined and smooth.
- Gradually add the dry ingredients to the wet ingredients, mixing on low speed until just incorporated. Do not overmix.
- Roll out the dough on a lightly floured surface to about 1/4 inch thickness. Use a skull-shaped cookie cutter to cut out cookie shapes.
- Carefully transfer the skull-shaped cookies to the prepared baking sheets, spacing them about 2 inches apart.
- Bake in the preheated oven for 8-10 minutes, or until the edges are lightly golden but the centers are still soft.
- Remove from the oven and let the cookies cool on the baking sheet for 5 minutes, then transfer to a wire rack to cool completely.
- Once cooled, prepare royal icing in various colors for decorating. Use piping bags and fine tips to create intricate skull designs, traditional Day of the Dead patterns, and detailed facial features.
- Allow the royal icing to dry completely, which may take 1-2 hours depending on the thickness of the decoration.
- Store decorated cookies in an airtight container at room temperature for up to 5 days.
Tips
- • Ensure your butter is truly softened but not melted for the perfect cookie texture • Use a skull-shaped cookie cutter for precise and consistent shapes • Roll dough to an even 1/4 inch thickness to guarantee uniform baking • Chill the cut-out cookies for 10-15 minutes before baking to help them maintain their shape • Use royal icing at the right consistency - not too runny, not too thick • Invest in fine-tipped piping bags for intricate decorative details • Allow icing to dry completely between color layers to prevent bleeding • Store decorated cookies in a single layer to prevent design damage • For extra Halloween flair, experiment with black, orange, and purple icing colors
Nutrition Facts
Calories: 160kcal
Carbohydrates: 20g
Protein: 2g
Fat: 8g
Saturated Fat: 5g
Cholesterol: 25mg

