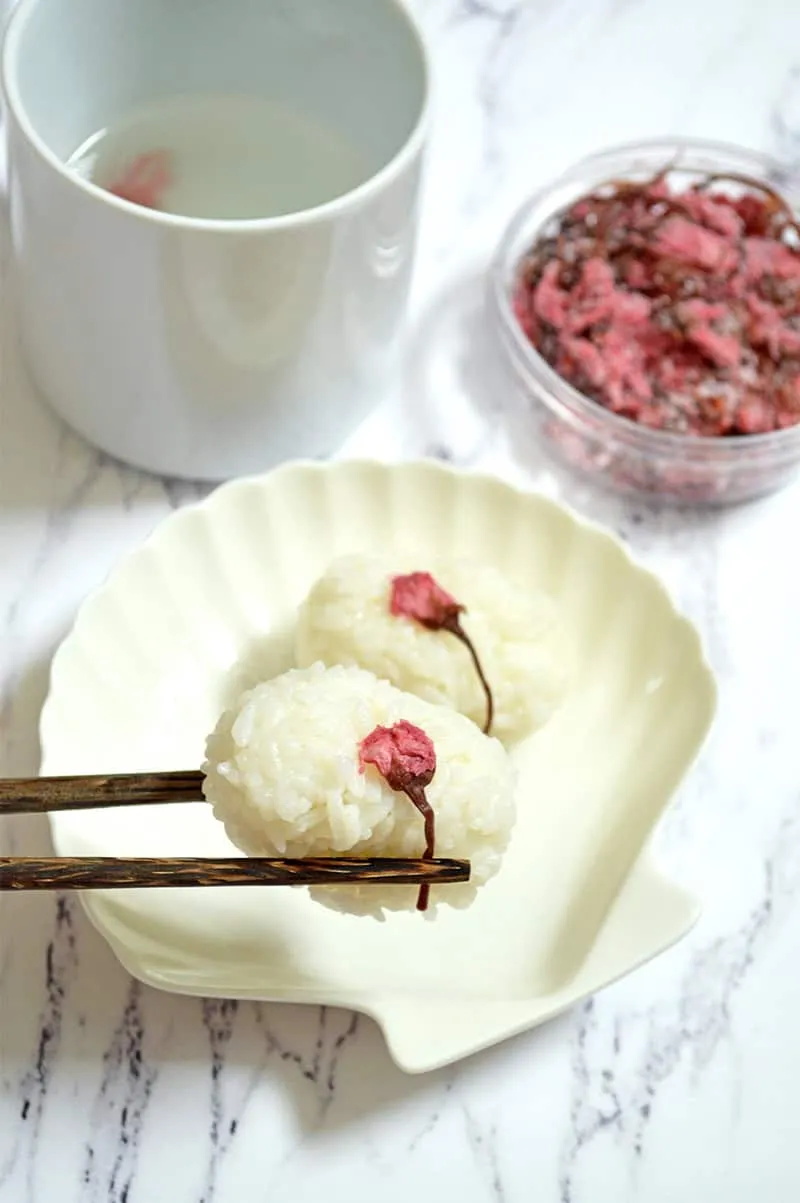
Discover the delicate charm of Japanese cuisine with our delightful Cherry Blossom Rice Balls! These beautifully crafted treats are not only a feast for the eyes but also a burst of flavor that will transport you to the serene cherry blossom gardens of Japan. Perfect for a picnic, a unique appetizer, or a fun cooking project, these rice balls are sure to impress your family and friends. With just a handful of ingredients and a few simple steps, you can create a dish that’s as enchanting as it is delicious. Ready to embark on a culinary adventure? Let’s dive into the recipe!
Prep Time: 10 mins
Cook Time: 20 mins
Total Time: 30 mins
Cuisine: Japanese
Serves: 6 servings
Ingredients
- 2 cups sushi rice
- 2 1/2 cups water
- 1/4 cup cherry blossom pickles
- 1 tablespoon rice vinegar
- 1 teaspoon sugar
- Salt to taste
- Sesame seeds for garnish
Instructions
- Rinse the sushi rice thoroughly under cold water until the water runs clear, removing excess starch.
- In a medium rice cooker or pot, combine the rinsed rice and water. Cook the rice according to standard rice cooking methods, ensuring the rice is soft and sticky.
- Once the rice is cooked, let it rest for 10 minutes with the lid closed to allow steam to distribute evenly.
- In a small bowl, mix rice vinegar, sugar, and a pinch of salt to create a seasoning mixture.
- Gently fold the vinegar mixture into the warm rice, using a rice paddle or wooden spoon to mix without crushing the grains.
- Finely chop the cherry blossom pickles into small, uniform pieces.
- Wet your hands with clean water to prevent rice from sticking, and sprinkle a little salt on your palms.
- Take a small portion of rice and flatten it in your palm, place a small amount of chopped cherry blossom pickles in the center.
- Carefully shape the rice into triangular or round balls, ensuring the pickles are enclosed within the rice.
- Roll the completed rice balls in sesame seeds for added texture and garnish.
- Arrange the rice balls on a serving plate and serve at room temperature.
Tips
- Rinse the Rice Well: Make sure to rinse the sushi rice thoroughly until the water runs clear. This step is crucial for achieving the perfect sticky texture that holds the rice balls together.
- Use a Rice Cooker: If you have a rice cooker, use it! It simplifies the cooking process and helps you achieve consistently fluffy rice.
- Let the Rice Rest: After cooking, allow the rice to rest for 10 minutes with the lid on. This extra step helps the rice grains firm up and makes them easier to handle.
- Seasoning is Key: Don’t skip the seasoning mixture of rice vinegar, sugar, and salt. It adds a wonderful tangy flavor that complements the cherry blossom pickles beautifully.
- Wet Your Hands: To prevent the rice from sticking to your hands, always wet them before shaping the rice balls. This will make the process much easier and less messy.
- Experiment with Shapes: While traditional rice balls are often triangular, feel free to get creative with different shapes! Round, oval, or even heart-shaped rice balls can add a personal touch.
- Garnish for Flair: Rolling the rice balls in sesame seeds not only adds a delightful crunch but also enhances their visual appeal. Don’t skip this step!
- Serve at Room Temperature: These rice balls are best enjoyed at room temperature, making them a perfect make-ahead option for gatherings.
Nutrition Facts
Calories: 150kcal
Carbohydrates: 30g
Protein: 3g
Fat: 1g
Saturated Fat: g
Cholesterol: 0mg